


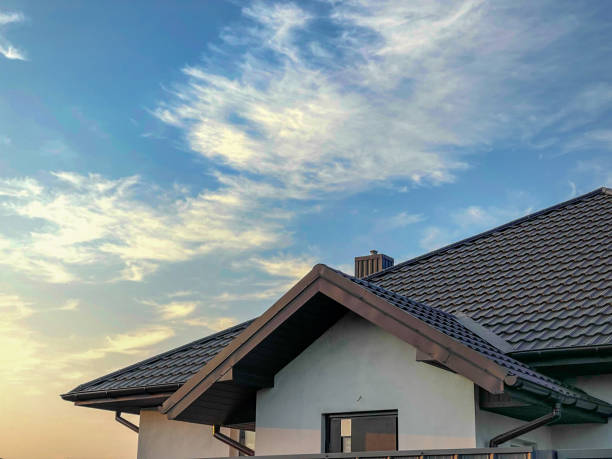
Step by Step Process of Reliable Roof Inspection Services Near Me in Saint Matthews, KY
Booking a roof inspection in Saint Matthews KY? Here’s the step-by-step process and what should actually happen on inspection day.
Most folks in Saint Matthews don’t think about their roof until something goes wrong. A wet ceiling after a storm. Missing shingles spotted from the driveway. A mysterious water stain on a bedroom wall. By the time you notice problems from inside the house, the actual damage on the roof has usually been growing for months.That’s why regular roof inspections matter so much. They catch small problems before they turn into expensive ones. A few hundred dollars for an inspection now can save you twenty thousand on water damage repair later.
But most people have no idea what a real roof inspection actually involves. So today we want to walk you through the step-by-step process of a professional roof inspection — what should happen, what gets documented, and what good service really looks like. If you’re thinking about booking one or just had a contractor offer you a “free inspection” after a storm, Bluegrass Brothers Roofing Contractors has been working on Louisville-area roofs for years and we know what real inspection work looks like.
Why Saint Matthews Roofs Need Regular Inspections
Quick context first. Saint Matthews has a mix of homes from different eras — older traditional houses from the 1940s through 1960s, mid-century ranch homes, and newer construction filling in around them. Each type of roof has its own concerns.
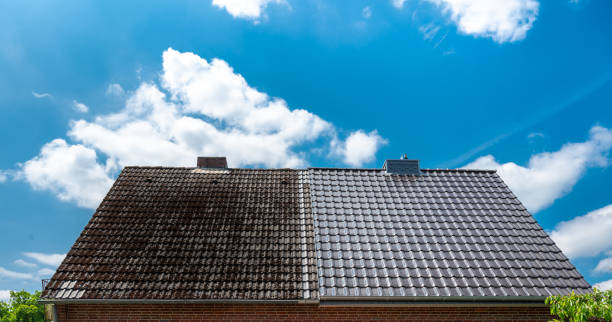
Older Saint Matthews homes often have multiple layers of roofing material added over the years, original slate or tile in some cases, and aging flashings that need attention. Newer homes face different issues — premature granule loss on asphalt shingles, settling-related issues at valleys and flashings, and warranty-related concerns from materials installed in the past 15 years.
According to the National Roofing Contractors Association, regular roof inspections can identify problems while they’re still inexpensive to fix, potentially saving homeowners thousands in major repair costs over the life of a roof. Have you ever talked to a neighbor who got blindsided by a $25,000 roof replacement that “came out of nowhere”? Most of the time, that situation was building for years and a real inspection would have caught it early.
Step 1: Scheduling and Initial Phone Call
Every professional roof inspection starts with a phone call. A real roofing company asks questions during this first conversation:
- Age and type of your current roof
- Any visible problems or recent damage you’ve noticed
- Recent storms or weather events that prompted the call
- Whether you’re planning to sell, buy, or just maintain the property
- Insurance considerations if any apply
This call usually takes 10 to 15 minutes. By the end, the inspector has a rough idea of what they’re looking at and you have an idea of timing and cost. Real inspections in the Saint Matthews area typically run $200 to $450 for a standalone service, though many roofers offer free inspections when tied to potential repair work.
Step 2: Pre-Inspection Property Review
A few days before showing up, a professional inspector does some homework. They look at aerial imagery of your property to get a sense of the roof layout. They check the address against their database of past work in the area. They review your property’s age and likely roof type if you’ve shared that information.
This sounds minor but matters. An inspector who shows up knowing nothing about your property is starting from zero. One who’s done five minutes of prep can ask better questions and spot issues faster.
Step 3: Initial Walkthrough and Discussion
When the inspector arrives, the first 10 to 15 minutes happen on the ground. They walk around the perimeter of your home, look at the roof from multiple angles, and check the obvious surface-level issues.
This is also when they talk with you. Real inspectors ask:
- When did you last have roof work done?
- Have you noticed any leaks, drafts, or interior issues?
- Did the previous owner share any roofing history?
- Have you had any storm damage claims recently?
The answers shape what they look for during the actual inspection. A house with a recent claim filed gets different attention than one with no history of issues.
Step 4: Getting on the Roof
Now the real work starts. A professional inspector physically gets up on your roof. Yes, all of it. The whole point of an inspection is to look at things you can’t see from the ground.
Inspectors use proper safety equipment — harnesses, ladders rated for the load, and sometimes specialized footwear for steep pitches. Some roofs are too steep or too damaged to walk on safely, in which case experienced inspectors use drones or do detailed visual inspection from ladders and adjacent surfaces.
If an “inspector” doesn’t get on your roof at all — just looks from the driveway — that’s not a real inspection. That’s a sales call.
What a Real Roof Inspection Actually Checks
Here’s a quick reference of what should be inspected:
| Component | What Gets Checked |
| Roof surface | Shingle condition, missing pieces, wear patterns |
| Valleys | Water flow paths, flashing condition |
| Flashings | Chimneys, vents, skylights, walls |
| Penetrations | All roof openings sealed properly |
| Gutters | Drainage, slope, attachment |
| Soffits and fascia | Rot, paint condition, ventilation |
| Ridge vents | Air flow and seal integrity |
| Underlying decking | Soft spots indicating water damage |
| Attic interior | Insulation, ventilation, water marks |
| Exterior walls | Water damage near roof line |
Real inspections cover all of this. Quick inspections that skip half the list miss the most important early-warning signs.
Step 5: Photo Documentation
A professional inspection produces lots of photos. Hundreds, in some cases. Every issue gets photographed, every damaged area gets multiple angles, and every section of the roof gets at least one overview shot.
This documentation matters for three reasons:
- It gives you a visual record of your roof’s current condition
- It supports insurance claims if storm damage is present
- It creates a baseline for comparison during future inspections
If an inspector doesn’t produce photos as part of their report, that’s a major gap. Words alone aren’t enough when discussing roof conditions.
Step 6: Attic Inspection
This is the step that surprises a lot of folks. A real roof inspection doesn’t end on the roof. It continues in the attic.
Many roof problems show up first inside the attic, not on the outside surface. Water stains on rafters. Daylight visible through small holes. Compressed or wet insulation. Improper ventilation. Mold or mildew growth.
An inspector spends 20 to 30 minutes in your attic checking for these things. If they skip this step, they’re missing half the picture.
For Saint Matthews homeowners who want a real inspection that covers both roof and attic properly, Professional Roof Inspection Services Near Me in Saint Matthews, KY is the type of local service that doesn’t shortcut the inspection process.
Step 7: The Written Report
After the on-site work, the inspector creates a written report. This usually takes 1 to 3 business days to deliver.
A real inspection report includes:
- Date of inspection and inspector identification
- Overall roof condition summary
- Estimated remaining life of the roof
- Photos of all findings with descriptions
- Specific issues with severity ratings (minor, moderate, major)
- Recommended repairs with rough cost estimates
- Suggested timeline for any work needed
- Maintenance recommendations
If a “report” arrives as a one-page document with vague language, it’s not a real report. Get a different inspector.
Step 8: Walkthrough Discussion of Findings
The best roofers go over the report with you in person or by phone. They explain what they found, what’s urgent versus what can wait, and answer questions about specific concerns.
This conversation matters. Reading a written report and seeing the photos is one thing. Having someone explain what each finding actually means for your home is another.
According to the U.S. Census Bureau’s housing data, the average age of owner-occupied homes in established neighborhoods like Saint Matthews tracks higher than in newer subdivisions. Older homes generally need more careful inspection because more components can be aging out at the same time.
Step 9: Decision Time
After the inspection and report, you have decisions to make. The findings fall into categories:
Immediate repairs — issues that need attention within weeks to prevent damage
Planned maintenance — items that can wait but should be addressed within 1 to 2 years
Long-term planning — full replacement timing based on overall roof condition
Documentation only — things to note but not act on yet
A good inspector helps you prioritize these. They don’t try to upsell you on work you don’t need, and they don’t undersell genuine problems to seem agreeable.
A Saint Matthews Story Worth Sharing
A family near Westport Road called us last fall. They were considering selling their home in the spring and wanted an inspection before listing. Their roof was 18 years old, which they thought meant it was due for replacement.
Our inspection found that the actual roof surface was in surprisingly good shape — quality shingles, well-installed originally, and with at least 5 to 7 years of life left. The real problems were the flashings around their two chimneys and a section of gutters that had pulled away from the fascia.
We recommended repair work totaling about $3,200 instead of full replacement at $22,000. The repairs got their roof into great shape for the spring listing. The house sold for more than asking, and the buyers’ inspector confirmed the roof was in good condition.
The lesson? A real inspection saves money. A surface-glance estimate from a salesman pushing for replacement does not.
Wrapping It Up
Professional roof inspections protect your home in ways most folks don’t think about until they need it. The right inspector follows a real process — phone consultation, on-site walkthrough, on-roof inspection, attic check, photo documentation, and detailed written report. Skip any of these steps and the inspection isn’t worth much. Watch out for “free inspections” from out-of-area storm chasers that turn into pressure-selling situations. For Saint Matthews homeowners ready to know what’s really happening on their roof, the Best Roof Inspection Near Me in Saint Matthews, KY team is a strong place to start.
FAQs
How often should I have my roof inspected in Saint Matthews?
For most homes, plan on a professional roof inspection every 2 to 3 years. After major storms with hail or high winds, schedule one within 30 days even if no damage is visible from the ground. Older roofs over 15 years old benefit from yearly inspections to catch wear before it becomes leaks. Newer roofs under 5 years old can usually go 3 to 5 years between inspections if no storms have hit.
How long does a professional roof inspection take?
Plan on 60 to 120 minutes for the on-site work, plus another 1 to 3 days for the written report to arrive. Simple ranch-style homes go faster. Complex roofs with multiple levels, dormers, and steep pitches take longer. The on-roof time depends on size — a small home might be 30 minutes on the roof, while a large complex roof can take well over an hour. Quick inspections under 30 minutes total usually skip important steps.
What does a roof inspection cost in Saint Matthews?
Standalone professional roof inspections in the Saint Matthews area typically run $200 to $450. Many roofers offer free inspections when tied to potential repair or replacement quotes. Real estate transaction inspections may cost more because of the detailed documentation needed. Avoid completely free inspections from companies that knock on your door after storms — these usually come with high-pressure sales tactics.
Can I do my own roof inspection?
A basic visual check from the ground is something every homeowner can do regularly. Walk around your home and look for missing shingles, damaged flashings, sagging gutters, or visible damage. For a real assessment, hire a professional. Walking on your own roof creates real safety risks, and most homeowners can’t identify subtle damage signs that experienced inspectors catch. The few hundred dollars saved isn’t worth a fall or a missed problem.
Will my insurance pay for a roof inspection?
Standard homeowners insurance doesn’t pay for routine inspections — those are considered maintenance. After a covered weather event like hail or wind damage, some insurers will reimburse inspection costs as part of the claim. A few insurance companies offer free inspections as part of their policy benefits. Check with your specific carrier to see what’s available before paying out of pocket if a storm just hit.
For most homes, plan on a professional roof inspection every 2 to 3 years. After major storms with hail or high winds, schedule one within 30 days even if no damage is visible from the ground. Older roofs over 15 years old benefit from yearly inspections to catch wear before it becomes leaks. Newer roofs under 5 years old can usually go 3 to 5 years between inspections if no storms have hit.
Plan on 60 to 120 minutes for the on-site work, plus another 1 to 3 days for the written report to arrive. Simple ranch-style homes go faster. Complex roofs with multiple levels, dormers, and steep pitches take longer. The on-roof time depends on size — a small home might be 30 minutes on the roof, while a large complex roof can take well over an hour. Quick inspections under 30 minutes total usually skip important steps.
Standalone professional roof inspections in the Saint Matthews area typically run $200 to $450. Many roofers offer free inspections when tied to potential repair or replacement quotes. Real estate transaction inspections may cost more because of the detailed documentation needed. Avoid completely free inspections from companies that knock on your door after storms — these usually come with high-pressure sales tactics.
A basic visual check from the ground is something every homeowner can do regularly. Walk around your home and look for missing shingles, damaged flashings, sagging gutters, or visible damage. For a real assessment, hire a professional. Walking on your own roof creates real safety risks, and most homeowners can’t identify subtle damage signs that experienced inspectors catch. The few hundred dollars saved isn’t worth a fall or a missed problem.
Standard homeowners insurance doesn’t pay for routine inspections — those are considered maintenance. After a covered weather event like hail or wind damage, some insurers will reimburse inspection costs as part of the claim. A few insurance companies offer free inspections as part of their policy benefits. Check with your specific carrier to see what’s available before paying out of pocket if a storm just hit.